Plug-in install
No soldering for the standard connection.


A2ThreeD device guide
Plug-in RGB LED controller for the Hasbro 1984 Proton Pack
PixelBro84 installs inline with the factory cyclotron LED connection. It reads the pack’s normal lighting sequence, lets you select the cyclotron color, and provides a synchronized output for optional cake LEDs.
No soldering for the standard connection.
Button control with saved settings.
3-pin JST-SM addressable LED output.
Installation
Turn the pack off, disconnect power, and remove the rear cover according to the pack manufacturer’s instructions.
Locate the four-pin cyclotron LED connector on the factory electronics PCB and unplug it. Note its orientation.
Plug PixelBro84 into the factory PCB, then plug the original four-pin cyclotron harness into the matching PixelBro84 connector.
Optional: connect the cake LED string to the three-pin JST-SM output. Secure the controller and reinstall the rear cover.
On-device control
Press + release
The selected color is saved for the next power-up.
Hold about 2–3 seconds
Bypass mode lets the pack continue running with the lid removed so the cake LEDs remain visible.
Confirmation: all four cyclotron LEDs flash red twice.
USB setup
Choose colors, set up the cake LED string, test LEDs, and save settings directly to PixelBro84.
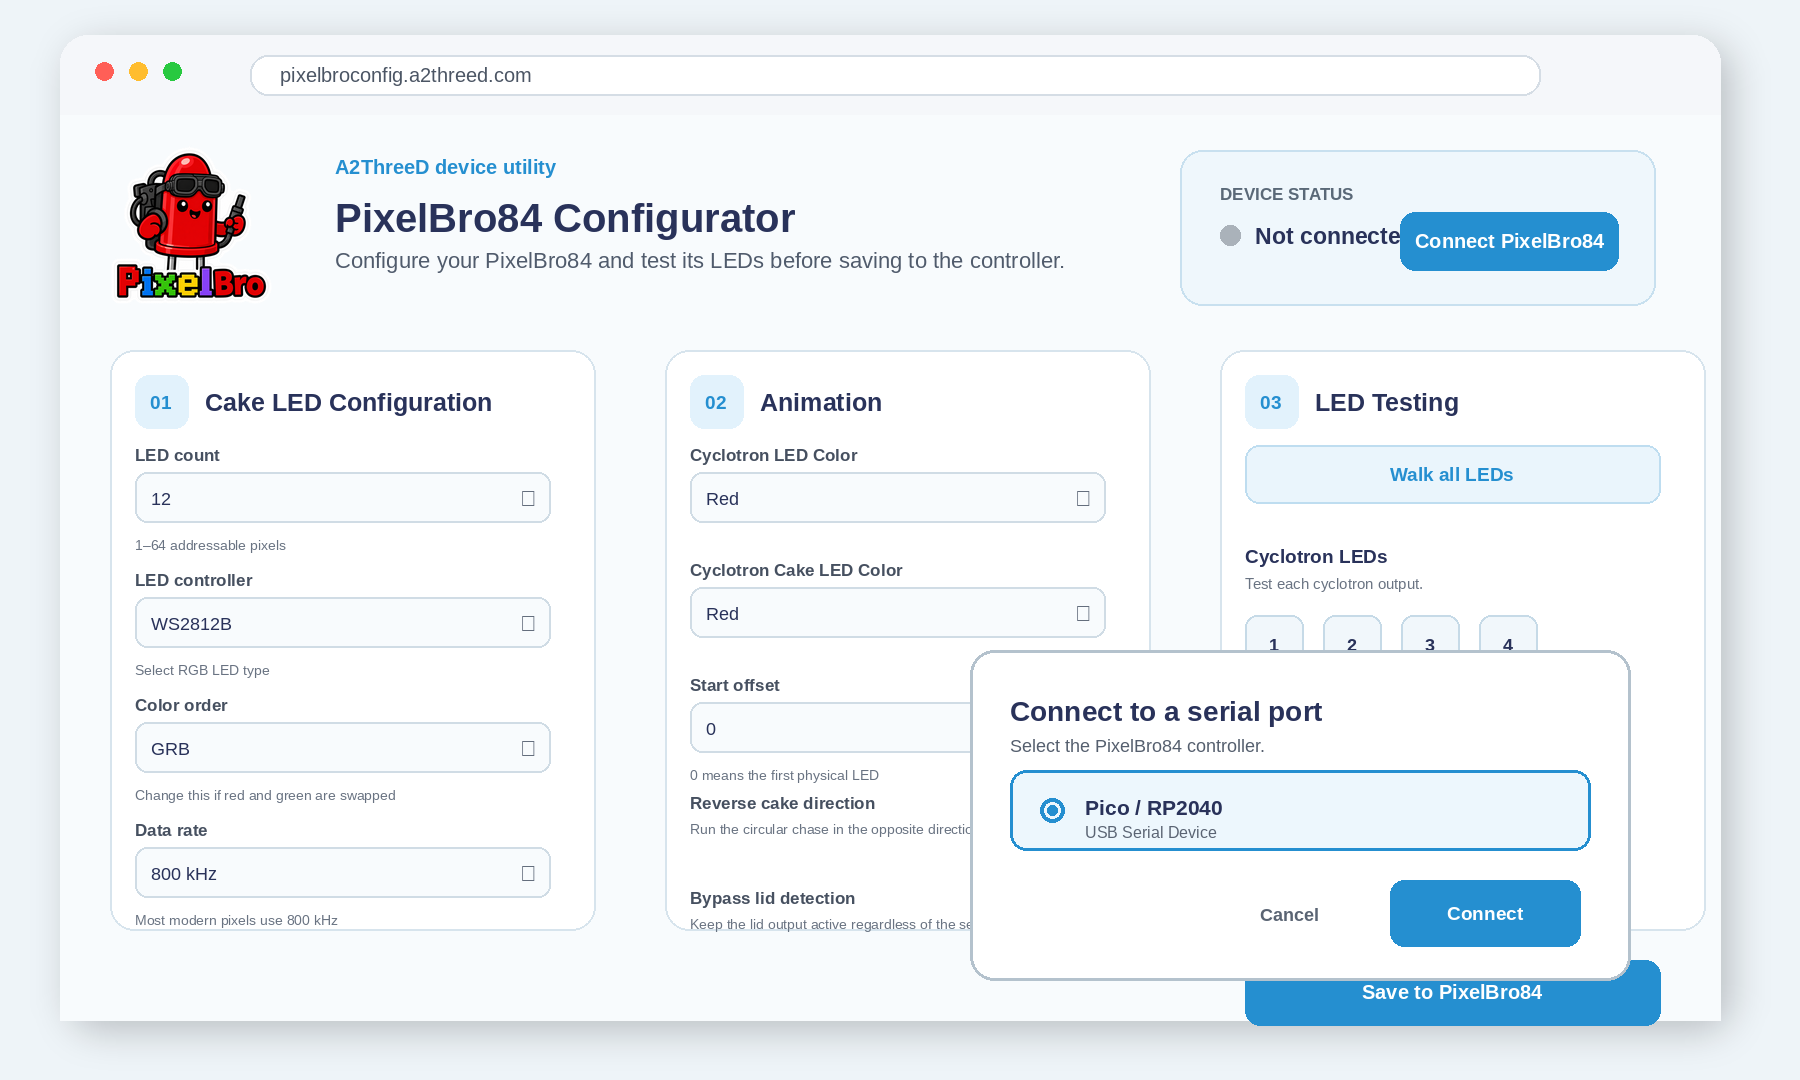
Connect PixelBro84 to the computer.
Go to pixelbroconfig.a2threed.com.
Click Connect PixelBro84, then select Pico / RP2040.
Adjust or test LEDs, then select Save to PixelBro84.
Set LED count, controller type, color order, data rate, direction, and start offset.
Choose cyclotron and cake colors, reverse direction, and set lid-detection bypass.
Walk all LEDs or test individual cyclotron and cake positions, then save to PixelBro84.
Troubleshooting
Use Chrome or Edge, a data-capable cable, and a direct USB port. Close other serial-terminal applications.
Change Color order in the configurator, test an LED, then save.
Reconnect, make the change, select Save to PixelBro84, and wait for confirmation.